| Home | Open Account | Help | 294 users online |
|
Member Login
Discussion
Media SharingHostingLibrarySite Info |
Railfan Technology > Photoshop ElementsDate: 03/11/20 11:41 Photoshop Elements Author: pwh Is it worth buying Photoshop Elements? My main purpose is to clean up slides or improve color, etc. Can it improve slightly blurry images and improve contrast. I don't want pay a monthly fee for online use. Thanks
Posted from Android Date: 03/11/20 12:27 Re: Photoshop Elements Author: hot_tub I use Elements to clean my slide scans because I find it easier/quicker than Lightroom. The Easy Smart fix does a good job of enhancing everything too, but it does seem to add a green cast. After using Elements, I import into Lightroom to finish processing (I have the last version you could buy outright - I think it is still avaliable). If you are not in a hurry, keep an eye on the B&H deals of the day. Every now and then, Elements shows up at a significant dicsount.
Date: 03/11/20 14:15 Re: Photoshop Elements Author: chico first 30 days free
Date: 03/11/20 14:21 Re: Photoshop Elements Author: Frisco1522 I moved over to Elements from Photoshop several years ago. I don't get involved in super heavy work, so Elements serves me well. Most of what I scan are old PC, 616 and other old stuff. Works fine for me.
Date: 03/11/20 15:08 Re: Photoshop Elements Author: twjurgens I'm using Elements and like it. hot_tub is correct about the auto fix adding a greenish cast. I haven't been able to correct that so generally don't use it. It's an inexpensive alternative that does a good job!
Date: 03/11/20 16:40 Re: Photoshop Elements Author: BRAtkinson For me, Lightroom 2020 is my first step editing scanned slides. Elements 13 is step #2.
I prefer Lightroom as it does everything I generally want to do for my own digital photography as well as scanned slides. Setting white balance with a single click based on a white-ish item in the scene and then tweaking from there is a big time time saver. Cropping to fix slightly not-horizontal photos as well as sometimes to remove distracting items in the scene is a boon, as well. So is the ability to apply 'blanket' edits to all the slides such as automatic white balance, automatic tone control (I sometimes adjust each a bit, too), some sharpening, and my favorite new feature: dehazing which brings out the colors better than vibrance and clarity in my opinion. I also use a number of keyboard shortcuts rather than moving the cursor and clicking something to save time while doing 100+ numbers of images. Elements doesn't have similar keyboard shortcuts, and one, 're-do', uses a different short cut key in Elements than Lightroom! Obviously the two development teams have little to do with each other. Another feature in Lightroom that I haven't found in Elements, (though it may be buried somewhere in the full Photoshop version, but I neither looked for it nor stumbled upon it), is the specific lens correction feature as well as the ability to straighten parallel lines, ie, de-keystoning fperspective eature. also, I generally stay away from the full Photoshop(part of the $10/mo club) as the various icons on the screen are far smaller than in Elements. Note that I've been using Lightroom and Elements and upgrading about once every couple of years since about 2008 or so. So I'm very adept at getting Elements as well as Lightroom to do what I want it to do. I only have two complaints about Lightroom: 1) how they 'store' the list of changes made and 2) the 'heal' function sometimes selects weird (undesirable) source locations. Until I updated from Lightroom 6 to the 'rental' Lightroom 2020 about 6-7 months ago, all the changes made to all the slides appeared to be stored in a single file that was completely 'read' from front to back and then the latest change (ie, click) would be written to the end of that file. The 2020 version now stores all the changes for each image separately. That alone was a great speedup in processing large numbers of images at the same time, be it my own 'shoots' or someones' slides. But after making 50 or so changes, primarily removing the larger dust and scratches, it slows down noticably. I tracked it down to what I suspect is that for every 'heal' function where it's a circular pattern only, it likely stores the pixel coordinates of the from and to and diameter of the circle. Moving the cursor to make it a 'streak' or follow a scratch likely records a series of from-to coordinates that indicates the 'path' you took with the cursor. Hence, I've learned to put off doing any non-circular 'heal' functions until last. As for the 'heal' function, I've had to learn how to sort-of 'force it' to choose the desired source target. One way is to include a straight line such as the corner of a wall as part of the 'target'. That forces it to take the source from somewhere along the same straight line. Interestingly, however, is it doesn't always line up the straight line when done, so I have to 'move' the source area a bit to line it up. That's a benefit of LR, too, the ability to 'move' the source and target areas if it doesn't choose what you want or mis-aligns them. Elements doesn't have an 'after the fact' move capability in its 'heal' function. As it turns out, right now I'm in the process of scanning 600+ slides for a family at church. The slides were taken by her parents in the '50s-'70s. Some of them seem to have ground in dust that both a brush and a squeeze-bulb blower didn't remove. Tons and tons of dust! And some have varying levels of mold that appear like a spider hit with a sledge hammer. My general method is to use Lightroom to handle the larger, more obvious and/or darker dust specs, one at a time. I sometimes have to spend 10-15 minutes on a single slide due to there being so much to correct, mostly in the sky portions of the image as dust shows far more there. If there's dust in foliage areas, I sometimes ignore it as it generally blends in with all the green. I go to extremes editing for dust and scratches in LR, the most obvious is zooming in using 3x magification of the image to show it most clearly and 'separated' to make an 'easy' target. The 'heal' function seems to 'grab' different color than the bulk of what is being healed and ends up with a greenish tint if next to foliage, etc. The trick is to have NO 'other' colors within the circle to be 'healed'. Sometimes that's impossible, so I have to save that for the Elements 'clone/stamp' tool when I process through the group of images a 2nd time. What are the advantages of Elements over Lightroom? I'd have to say the 'clone/stamp' tool for all images and the 'dust and scratches' tool for slide cleanup. The 'heal' function in Elements oftentimes gets a better result than that of Lightroom, but the 'heal' function in Elements is a fixed, non-adjustable circle size, requiring more moving the mouse around to get a larger area. Heal does a better job of 'blending in' the area than does Lightroom, in my opinion as it seems Lightroom does it more as a 'clone/stamp' vs Elements 'blending' method. I use the 'clone/stamp' tool in my own images to remove background clutter and other distracting elements if I think it would improve the image. In processing slidesas well as my own digital photos, clone/stamp is most useful for detail touch-ups at the 1 to 10 pixel size on the screen. I have no problem going as small as seeing each pixel on the screen and changing them to do such things as lighten up areas around peoples' eyes to fixing individual letters on a sign somewhere in the photograph. When I want to be more 'quick and dirty' with my Elements editing, I switch from the 'Expert' mode to the 'Quick' mode. The quick mode doesn't have the features of the expert mode, but the simple all-in-one image improvement slider helps out, as does lighting adjustments, etc. Another feature of Elements is that I can manually crop photos to a fixed size without having to go back, open a list box and select the size each time like Lightroom does. I can set 4x6 once, for example and crop the image as I want it cropped, not what my photoprinting software does automatically. No need to re-select 4x6 each time. As for 'red eye' correction goes, both products red eye processing is somewhat 'fussy' in that it only fixes it maybe 50% of the time. The rest of the time, they do nothing. The negatives to Elements is that it can't make 'mass changes' over a group of images like Lightroom. Nor does it have a quick white-balance setting method that I've found. Nor can it 'mass export' all or any size group of images at the same time as can Lightroom. What I do with 100-150 images I've edited as a group is to 'X' out of Elements, and let it scream, image by image about JPG parameters, replace existing file (I copy all my Lighroom images (in a folder named: Lightroom Output) to the folder named: Photoshop Output before opening up Photoshop Elements). It's four separate 'yes' clicks per image. To speed things up, I move the popup windows for each of those clicks such that the 'yes' button is in the same physical location on my screen resulting in saving a half-second or more per click by not having to move the mouse! I was curious about the current Elements 2020 to see if there's anything new that I could use, so I gave it a free 30 day trial starting about 2 weeks ago. I found it to be a bit 'sluggish' compared to Elements 13. But the real 'deal breaker' was that I could not install my purchased add-in for noise handling. I first tried the version I had from 4 years ago, and then downloaded a new version (I didn't know they had free updates!) and that wouldn't install either. So I contacted the vendor, and I got a reply they only support Elements 15 and earlier due to significant interface problems they had after Elements 15. So, I deleted Elements 2020 from my computer. What a joke! It deleted next to nothing! The folder was there with all the programs, and if I clicked on its icon still on my desktop, it came up just fine. I ultimately resorted to a specialized techy-oriented registry cleanup tool and even that didn't automatically clean out Elements 2020. I ultimately used another registry tool to 'search and destroy' all references to Elements 2020 and deleted all folders in various places to get it off my computer once and for all. Of course, downloading Elements 2020 'revived' the stupid Adobe Cloud on my computer, so I had to surgically remove that AGAIN, as well! For what it's worth, even if I don't use ANY Adobe product during the current boot session, I counted 14 different processes that unconditionally start at bootup! I've disabled each one except the one that keeps Flash Player up to date. They have a separate 'update checker' for the their the rest of their products. Why not the two combined? Why don't the Lightroom staff and Photoshop staff communicate with each other? Is there a clear winner of Lightroom and Elements? They both do numerous things in each product that the other one doesn't handle as easily or at all. For my uses, having them both is what's needed to use the best of each of them to get editing completed. And one more thing...Elements comes with a built in image cataloging system that allows one to search for 'all SD 40' images,for example. I don't use it at all. I simply catalog all images in folders primarily by subject matter or event. In the case of repeating events, they're all in their own folders, in an 'events' folder. Sometimes the folders are 3-4 deep. Could I do a 'find all SD 40' images easily? No. I'd have to look at the images in each related folder on my screen as 'extra large icons' and pick from there. For me, the amount of time saved by not using the indexing system far outweighs once in a blue moon I want to find 'all SD 40' images. I should note that I run a very 'tight ship' in my computer. I've removed most of the useless built-in Windows 10 'feature' garbage, and disabled over 50 Windows 10 services to make the most RAM available at all times. Interestingly, I remove the King.com 'built in' Candy Crush and some other game that's part of Windows 10 and at the next update, it puts them back again! I've removed various fonts both as files and in the registry one at a time as well. I have no use for multiple Chinese fonts, for example. And every time the computer boots, it has to go out and find every font listed in the registry to ensure it is there. I'm also running an 8-processor computer at 4.6ghz with 16gb RAM and SSD storage. Addendum added several hours later than above - I forgot to mention that going to Adobe.com and creating a userid/password, one can download a fully functional trial version of Elements that's good for 30 days. I didn't check, but it may be possible to download a trial version of Lightroom as well. Also, having just finished another 3+ hours of processing my friends dusty slides, I'm starting to lean more towards Elements for removing larger & darker dust and scratches as the 'heal' function source selection is getting more and more frustrating in its inaccuracy. For example, I clicked on a spot on the brides' wedding dress alongside a 'valley' in the material and it grabbed a piece of the trees in the background! Go figure! Attached is 2 crops from wedding pictures in the project I'm working on. In image #1, note the dark dust over the eyebrow of one of the bridesmaids. This is why it's sometimes necessary to get down to the individual pixel level to correct it, something that Lightroom can't do and if you do get to that level of magnification, there's no means to specifically choose a source pixel or 3 or 5. Image #2 is an heavily cropped example of the level of dust and scratches I'm dealing with, and even something I've never seen before...blue mold! I should also note that I could probably get rid of most of the dust and scratches using the 'dust and scratches' noise filter in Elements (no such filter in Lightroom), setting it to anything more than a 1 pixel radius results in too much image clarity degredation. That's why I remove the 'big ones' first, THEN use dust and scratches at the 1 pixel setting. Also note that using <cntl> F to repeat the previous filter (D&E) makes an improvement at removing the dust and scratches without too much additional degredation vs using D&E at 2 pixels is very noticable. Edited 3 time(s). Last edit at 03/11/20 21:46 by BRAtkinson. 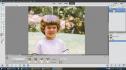 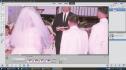 Date: 03/11/20 22:48 Re: Photoshop Elements Author: Plainsman Regarding noise handling with Elements, you might try Focal Blade sharpening software (https://thepluginsite.com/products/photowiz/focalblade/index.htm) which includes noise reduction. It works well for me (with an earlier version of Elements), and I believe they offer a free trial period.
Date: 03/12/20 16:01 Re: Photoshop Elements Author: chico BRAtkinson Wrote:
------------------------------------------------------- > For me, Lightroom 2020 is my first step editing > scanned slides. Elements 13 is step #2. > interesting gonna have to study this approach Date: 03/12/20 21:38 Re: Photoshop Elements Author: BRAtkinson Today I managed to slog through all of 16 wedding group of slides through Lightroom only in roughly 11 hours work. It helps to be retired.
While wearing out my mouse I gave more thought to what are the advantages of each product: 1. Over and over, I find that Lightroom Classic has far better color and tone control than Element: .....A Being able to set white balance simply by clicking a reasonably white item is the way to do it. I then tweak the sliders and in some cases, like these slides, the faces are still too orange so I can scroll down and adjust 8 sliders for saturation (+8 for hue, and 8 more for luminance) to pull out the orange. In the two photos attached, I had to completely remove all magenta and most of the purple colors to get rid of the tint in the slide. Then I could work on the dust and scratches. Having all the color controls onscreen along the right side (scrolling down to get them all, if needed) is a super time saver. .....B Presence, texture, clarity and dehaze sliders work exceedingly well for making dull images 'pop'. I sometimes make the 'blacks' in the tone group darker to add some pop as well. .....C And if all else fails, I can expand the 'tone curve' box and simultaneously make any number of color adjustments 2. For slides, and even my own digital images, I always give them a sharpening tweak. 3. I'll do a bit of noise reduction for my own digital images, but I depend more upon the plug-in product that I've installed in Elements for noise processing. It also does a great job at smoothing bad complexions, etc. 4. Being able to adjust (Transform) images to get verticals like door frames vertical again I use as needed. Obviously, shots of the Grand Canyon doesn't need any vertical adjustments. 5. Especially with lots of dust and scratches to deal with, the Heal function in Lightroom is fast enough until maybe 50-60 clicks or so. For me, being able to adjust the size of the healing circle with the mouse wheel is a big plus vs a fixed circle size in Elements. Sometimes the heal function selects the wrong source location, but I'm getting better every day at after-the-fact moving the source to where I want it...even if I did more 'heals' in the interim. I simply click the target field with the wrong source and that 'activates' it like it was the last thing done. 6. Knowing the limits of the 'heal' function not being able to heal very small areas, maybe 10x10 pixels or smaller can be frustrating. But knowing I can zoom in to individual pixels in Elements saves me from doing numerous heals and un-dos trying to get really close. On the other hand, Elements has its advantages, too: 1. It's really quick at every function. As I've mentioned already, Lightroom starts bogging down after 50 or so clicks of all types, and after maybe 150 clicks, the image sometimes jumps while trying to 'relocate' within an image. When it gets too annoying, I go on to the next image and finish up either by 'recycling' the LR export for that image as a new image to import and all the fixes thus far have been completed. 2. Being able to clone/stamp with any size source area is worth its weight in gold, in my opinion. It's fantastic for removing elements in an image or simply doing really close-in adjustments. I've even used clone/stamp to literally 'move' people from one location to another in the image. 3. Being able to 'cut out' something in the image and deal with it as a separate layer has saved the day for me a couple times. I'm a real rookie when it comes to cutting things out, adjusting and putting it back. I'll be doing a couple of those tomorrow as for whatever reason, sometimes the ladies hands and legs are considerably darker than their face and shoulders. 4. I'm sure Elements has some color adjustment capability other than in the 'quick' section. I just haven't bothered to dig it out as I do my color correcting in Lightroom. 5. For the times I want to edit a single image, such as one I find online and want to look at it in more detail and then delete, doing 'open with Elements' is far easier than importing into Lightroom, etc. For my own digital photography, I think using only Lightroom is sufficient for 90% of what I want to do and I could survive if I didn't have Elements. Processing my own slides mostly from the '70s-'80s, Lightroom is sufficient as although I haven't kept my slides in a cool, dark, low humidity environment all the time, the couple of hundred I scanned 2-3 years ago had very few problems that couldn't be easily handled in Lightroom. Scanning someone elses' slides that are completely random in order (did they throw the box of x-hundred slides in the air and let them fall as they may?) is a completely different animal. The project I'm working on right now is the 4th time I've done other peoples slides and prints. Every time I've encountered color shifts, fading, tinting, and dust and scratches from minimal to unbelievable. The project I'm working on now and the previous one introduced me to mold on the slides. Sometimes, it's in small enough patches of non-critical areas such as grassy areas, water, or sky, so I can simply do a big 'heal' on it and it comes out fine. One slide I processed tonight, the wedding banquet outdoors, had mold covering significant portions of the table of foot as well as the faces of a couple of individuals. There's no way I can ever make that slide look 100% OK. I'm shooting for an "If that's all that can be done, so be it" response from the couple. Considering it's a circa 1970 wedding and most of the participants, including the bride and groom have passed on, how critical will it be the B&Gs children and grand children? Considering that the best they had was numerous over or under exposed slides to look at with a hand viewer, I think they'll jump for joy at seeing them on their computer screen or even big TV screen. Bottom line...if there's numerous problems with the slides, in my opinion, both Lightroom and Elements are needed. For images where I don't need to do super-small area editing, Lightroom only is probably sufficient 95-98% of the time. Here's a before and after of the 'money shot' after putting it through Lightroom only, so far.   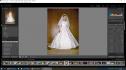 Date: 03/15/20 19:10 Re: Photoshop Elements Author: LV95032 Blurry and out of focus images can not be fixed in any commercial product today - maybe in the future. Otherwise it does all the other functions you list.
Elements is not a monthly subscription as stated by PC Mag: "What's more, it doesn't require a subscription, as Photoshop does, while still providing a good many of that program's tools. Photoshop Elements remains PCMag's Editors' Choice for enthusiast-level photo editing software." RWJ pwh Wrote: ------------------------------------------------------- > Is it worth buying Photoshop Elements? My main > purpose is to clean up slides or improve color, > etc. Can it improve slightly blurry images and > improve contrast. I don't want pay a monthly fee > for online use. Thanks > > Posted from Android Date: 03/15/20 21:59 Re: Photoshop Elements Author: BRAtkinson Part of my deliberations about upgrading Elements from #13 to 2020 was some of the newer features listed on Adobe's site in the comparison table with Elements 15...2020. Adobe Elements comparison I could find Elements 15 on ebay for $60, vs 2020 on Adobe for $80. Given the $20 difference, It would be tossup for me because most of the new stuff after 15 doesn't seem to be useful to me. Actually, things in 15 like open eyes, turn a frown into a smile and whiten teeth could be useful for my own photography of various events. Or even in the slides I'm still working on. In the wedding photos, there were 2 flower girls, both about 8 or 9. One of them looks like the 'grumpy cat' in nearly every photo with her in it! I emailed the image to the woman I'm doing the project for (she's in her early 50's, I'd guess) and she said those are two of her older cousins. I'm still thinking about getting a new 15 off ebay. That way I get the CD, too.
One of the annoying 'features' of the subscription Lightroom & full Photoshop $10/mo is that it sometimes requires me to sign on to Adobe.com as the product starts up. Probably to ensure 'connect' to their cloud stuff. I've only used the cloud for sending a group of pictures back and forth for a high school graduation presentation. After that, I removed all cloud related stuff that magically appeared on my computer. And for those folks who complain their Windows computer is getting slower and slower, one of the BIG ones is the cloud! I had a friend ask me to get his year-old laptop back to the speed it used to be. He not only had 4 different cloud services starting up (with each of them going through a lengthy synchronization process between laptop and cloud files), but he also had 2 anti-virus/internet security systems 'fighting each other'. He claimed he had to use 3 of the 4 cloud sites regularly and asked I not delete them. The 4th one and the 'didn't uncheck some box while downloading some software product' security system both disappeared that day, as did a fair number of useless Windows 10 features like fax and smart card handling services. And for those who follow the Dilbert cartoon series, the past couple of days have been 'the reality of cloud computing' oriented. Meanwhile, spending lots of time with Lightroom 2020 and Elements 13 each day has forced me to learn some new tricks. Even this 72 y/o geezer can still learn tricks. I had to chase through Adobes' difficult to use online 'help' screens to figure out how to 'cut out' a shape, put it into a new layer, edit that layer, then put it back into the original image. In one case, I had to remove the grooms' face while in the 'just-married-mobile' as it was purplish-red from the mold. I also had to remove the brides' right hand and arm while the wedding ring was being put on her finger for the same reason. I'm hardly an 'expert' now. But at least I know how to do it. I also discovered that Lightroom can go further than 3:1 zoom-in but it's a kludge to get to and given the lack of clone/stamp like Elements, not very useful. On the other hand, I discovered that the 'heal' function in Elements DOES have the ability to have a larger or smaller diameter area in the 'tools options' part of the lower left of the screen. So, like adjusting brush size and opacity for clone/stamp, one can change the size of the heal. It's move the cursor to the lower left of the screen, move the slider, then go back to what you wanted to heal vs the mouse wheel controls the size in Lightroom. It takes a couple minutes for me to mentally shift gears from Lightroom to Elements. And I frequently hold down <ALT>+click to select the source for 'heal' when only the clone/stamp does that. Interestingly, the Elements heal function is more accurate than that in LIghtroom, especially when lining up areas of patterns like cedar shake shingles or cloth grilles on loud speakers. Trying to make it heal significant areas of purple mold tinting required two steps. First to get the correct tint in the affected area, (I used clone/stamp, maybe next time I'll try cutting it out and editing it as a layer) and then use the heal function to get things aligned nicely and the correct colors. I'm more convinced than ever that for processing scanned slides and photos, BOTH Lightroom and Elements are needed. Lightroom especially for the color correcting capabilities and its ease of accessing those controls, and for easy to use white balance setting (click the icon or use the W key to toggle) and easy to use and adjust after-the-fact healing functions. The 'upright' perspective correction feature is great, too. That one is not in Elements or Photoshop as far as I know. Lightrooms' 'mass changes' aka 'SYNC' feature is worth its weight in gold, especially for my own digital photography to apply a number of changes 'across the board', or, at least, in a group of images taken under the same lighting conditions (white balance, tone, etc, etc). The 'Previous' button does the same thing, one at a time, but copies every adjustment made including heal functions, cropping, etc. Sync allows selectivity of what is copied 'across the board'. Alas, there's no SYNC or Previous feature in Elements or Photoshop. For slide processing, the most useful feature is 'dust and scratches' in the 'Noise' category. If that was available in Lightroom, I'd ditch Elements...or at least not use it for all my edited slides and digital images. Clone/stamp in Elements gets a bunch of use as well, especially for 'really close editing' like 10 pixels or less. There's no corresponding tool in Lightroom. Another useful feature in the 'noise' category is 'despeckle'. I use that for deeply underexposed slides that I have to brighten the daylights out of. What results looks almost like digital noise, and despeckle does pretty good at it. I then top that off with the plug-in noise handling software I bought back in 2014. Perhaps the worst I can say about Elements is that getting to the various adjusting controls (colors, exposure, etc) in Expert mode is a couple of clicks to navigate through 2 or more drop down menus vs a number of on-screen sliders with scroll down for more sliders on the right side in Lightroom. And, for what it's worth, I got a free version of Photoshop back in 2002 or 2003 when I bought my first digital camera, a Canon G3, which included a CD for Photoshop LE (Light Edition). I think the advances in digital image processing in the past 17 years or so is incredible and has possibly eclipsed the advances in CPU design in the same time frame. Edited 1 time(s). Last edit at 03/15/20 22:07 by BRAtkinson. Date: 03/23/20 06:16 Re: Photoshop Elements Author: hot_tub If anyone was inspired by this discussion to get PS Elements, today is your luck day - B&H Photo has it on sale today for $59.99 ($40 off). As I said before, they do this one from time to time.
Date: 03/23/20 06:22 Re: Photoshop Elements Author: hot_tub Stupid me, typed before I fully checked it out - looks like today's special is the video editing package, not the photo editing one. Sorry 'bout that!
Date: 03/23/20 15:56 Re: Photoshop Elements Author: mojaveflyer i've used Elements since I started shooting digital photography. I'm on the 5th itiragtionof PSE. I'm very happy with it what it does for me...
James Nelson Thornton, CO www.flickr.com/mojaveflyer Date: 03/24/20 10:54 Re: Photoshop Elements Author: BRAtkinson I'm still cooking through the 600+ slides for a family friend. I DID decide to take the upgrade from Elements 13 to 15 (the last one supported by my noise processing plug in) and got Premier Elements 15 as well at a super price on ebay from Adorama...that 'other camera store' in NYC that I've dealt with from time to time in addition to B&H. It was a used package including original box and inserts, and apparently Adorama got genuine serial numbers assigned to it as everything installed just like I expected it to. This will make it 3 purchased video editor programs on my computer now, too. It'll be interesting to see what that has to offer when I have the need.
Elements 15 has a new face-editing feature that 13 didn't have. I can now easily put smiles on peoples faces, limited smiles, though, as well as adjust their nose, eyes, foreheads and chins. I may go back and change the 'grumpy flower girl' to 'smiley flower girl' in one particular wedding photo (see attached). I'm still learning new tricks with Photoshop as well as Elements. And I've concluded that neither product, Lightroom or Elelemts, 'does it all'. There's things that LR can't do and things I wish PE would do. Add to that a learning curve for each. But then, I have to deal with everything from 100+ year old historical prints to old slides of mine and others, and recent digital images of my own. But for digital photos, mostly of trains as this is a railroad forum, I'm thinking Lightroom would be the way to go. White balance, other color adjustments, cropping and even specific lens correction capabilities are all 'right there' and easily used and accessed. On the other hand, Elements has a great photo catalog system (according to others), and can do the basic edits in the 'quick' mode just as easily...AND it can go to individual pixel level for 'close in' adjustments like brightening dark circles under peoples eyes. Give me a couple weeks to finish the slides and write a more comprehensive comparison of the two products.  Date: 04/09/20 13:14 Re: Photoshop Elements Author: BRAtkinson Let me start with a disclaimer: I am not and never was a professional photographer. Also, I have neither had nor currently have any relationship with Adobe, Inc. other than as a retail customer. For the most part, everything I’ve learned about using Lightroom and Photoshop Elements I gained by trial and error, with some exploration thrown in and Help button used when I couldn’t figure out how to do what I wanted. Also, I may not be held for liability or any other legal actions due to anything I’ve written here and in this thread. Everything here is a personal opinion and does not reflect that of the webmaster or anyone else on this or any other web sites.
I was introduced to Photoshop in 2003 when my first digital camera, a Canon G3, came with Photoshop LE (Lite Edition). LE was quite primitive compared to todays’ offerings. I used it primarily for color correction (it did NOT have a white balance feature) and cropping capabilities. I think it had some sharpening capabilities as well. Maybe 2007 or so, I had read good reviews of Lightroom, so I bought it. I found it was easier than the freebie PS LE to perform the edits I usually wanted to do, especially white balance and color adjustments. It was also easier to go from one edit to another (ie, ‘road handling’) due to most common functions always being on screen and intuitive use of the mouse wheel that changed according to what edit function was being performed. Today, I’m strictly an ‘occasional user’ of both Lightroom (LR) and Photoshop Elements (PSE). I currently use LR & PSE in large spurts (generally 2-4 months apart) whenever I do a photo shoot (no weddings or sports) or someone needs family photos and slides scanned. Needless to say, I upgraded each 5 or 6 times through the years due to camera upgrades (I set my cameras to produce both Raw and JPG images simultaneously) and/or Windows version upgrades that no longer supported my old versions. If new features were added, I was largely unaware of them until maybe years later, when I ‘discovered’ them. Despite many years of using both products, I figure I use considerably less than half of the capabilities of each and still consider myself a hack that oftentimes muddles around until I get the results I want. For the past 6 weeks or so, I’ve been scanning and editing more than 600 slides and a handful of prints for a friend whose parents shot slides in the ‘60s and ‘70s. I estimate I spent 150 hours or more each in Lightroom Classic 2020 and Photoshop Elements 13 (for about 3 weeks) then upgraded to PSE 15. Perhaps most interesting is I’ve learned a couple new tricks in each of them and even ended up adjusting my processing sequence for scanning slides as a result. I’ll try to keep this lengthy discussion to scanning slides and prints only, but I know I’ll have some comments regarding processing recently taken digital images as well. First, I’ve learned that neither LR nor PSE can do ALL the edits I want to do, regardless of whether they’re family prints & slides from the past 50 years or so, historical society black and white (brownish) prints and negatives more than 100 years old, or 22mp images I took yesterday. While there is significant overlap of features between the two, accessing them is usually much easier in one than the other. Also, there are features unique to each that make it worthwhile using both for editing film images. Perhaps Corel ($) or GIMP (free) or something else can ‘do it all’, but I suspect that Adobe leads the pack in product capabilities and great results. Regardless of which product one chooses to use, I see the biggest problem being overwhelmed by all the features available. I’m sure when first installing either program, one will get the feeling of jumping into the pilot seat on the space shuttle. I had the good fortune of working with both products within a couple years of their introduction. Hence, I started ‘small’ and slowly worked my way up from there. As new features were introduced, I slowly added some of them to my repertoire of adjustments I could use. I strongly recommend that anyone taking the plunge spend time on Adobe’s web site viewing the basic editing videos there as well as on Youtube. For what it’s worth, I picked up a couple new tricks that I immediately used in the past weeks from videos on Youtube. As a result, I’m going to go back and partially redo maybe 10-15 images that I can now get better results before I present the finished images to my friend. Whether shooting events, trains, or processing slides, negatives, or prints, my first step is always make multiple backups to HD and a USB ‘thumb drive’. Nobody wants to have an ‘oops everything is gone’ moment. (Cue Mr. Bill: ‘Oh NOOOOOOOO…..’) I also make backups at various points during my processing sequence so I can always ‘go back a step’ if I need to. I’ve been fairly successful at recovering other folks ‘oops’ with software I have. Thus far, my only ‘oops’ have been the loss of a couple hours of editing due to a faulty stick of RAM.   Date: 04/09/20 13:15 Re: Photoshop Elements Author: BRAtkinson In my opinion, the most important editing that needs to be done with images old and new is 3-fold: white balance, exposure, and cropping (leveling – we ALL shoot crooked!). When processing scanned images, removing dust and scratches is also high on the list of things to do. Fortunately, each of these functions is readily accessible in both LR and PSE ‘Quick’ editing screens. (I should note that the Quick editing screen in PSE is a good place to start for those new to editing and/or PSE as it allows a variety of ‘auto’ options as well as fine tuning those same options if desired).
For me, the first thing I do when editing an image is to get the colors ‘right’. For images taken with a digital camera, I prefer the LR ‘white balance’ dropper and simply click an off-white item in the image and presto-chango, it’s done! Sometimes a bit of temperature and/or tint slider adjustment is needed, too. In PSE, the same thing is done with the ‘balance’ setting, with ‘auto’ available as well as the same two sliders. No eye-dropper, though. In todays’ digital cameras, the AWB (Automatic White Balance) setting works surprisingly well and requires little post-processing adjustment of the JPG images produced in-camera. Raw (Canon) or Nef (Nikon) images are not processed in-camera and require all adjustments to be done in post processing. For scanned images, the colors can be anywhere from nearly perfect to wildly ‘off’. Most often, there’s an overall tint to the image due to chemical degradation in the slide film or print paper over the years. I always try to get it close using white balance tools, along with the two related sliders. But too often, it comes down to fiddling with (and ‘fiddling with’ IS the right term, here) individual colors. LR offers 8 separate color sliders from red to magenta and each can be adjusted in hue, saturation, and luminance. I simply twiddle and twiddle with them some more until I’m happy. The BIG trick is getting skin tones right (and railroad colors, too!)…if at all possible. Most times, a bit less red and orange saturation does the trick. However, too often I have to settle for ‘close enough’ when it comes to skin tones. Fortunately(?), many of the weird colors that need adjusting are in the blues and purples, which have minimal effect on skin tones. In the Quick mode in PSE, there are 3 ‘color’ sliders that change all colors together for saturation, hue and vibrance. Additionally, in the ‘enhance’ tab, there’s a more expanded ‘color’ selection of edits as well as ‘automatic’ for a number of them. As I generally do all color corrections in LR first, the only times I’ve used them in PSE Quick (or auto) mode is if I’m not completely happy with the colors so I see if PSE can do a better job. Sometimes I keep the updated PSE version. Other times, it’s <cntl> Z to undo what I just did. My next step is to get the exposure right. However, if the image is quite dark, I’ll fix exposure before colors. Back in the film days, one could only rely on a good meter, film speed, experience, and understanding the exposure triangle to get a good exposure. We didn’t know how good or bad we did on exposure until we got the film back from processing some time later. Many times, we’ve had to settle for ‘good enough’ when it comes to under or over exposed images as we may never get to photograph the subject(s) again and the cost of film and processing. In the 600+ slides I just finished, most were somewhere between a half-stop overexposed and underexposed and easily corrected. Some, more so. Additionally, there were at least 15-20 that were so badly underexposed that when the slide was held to a light, it was STILL too dark to figure out what it was. I wonder why they even kept them! In Lightroom, only by cranking the exposure settings to the max did I manage to recover anything resembling an image, and then had to deal with excessive multi-colored grain that looked very much like noise if it were a digital image. I then had to fiddle with various other exposure settings including contrast, highlights, shadows, whites, blacks, and various ‘presence’ settings and even color settings to get anything ‘respectable’. There were also a handful of severely overexposed images that despite all the fiddling I could come up with, I still ended up with what looked like a somewhat overexposed image in that everything was just too washed out to do much with. Perhaps if I spent an extra 10-15 minutes per image to fiddle with individual color saturation, hues, and luminosity, I could do better. But with too many slides yet to process ahead of me, I chose not to spend the time. I should note that I frequently adjust the ‘shadows’ slider to brighten them up as most inexperienced and/or underequipped photographers figure a flash cube or pop-up flash is sufficient to light an entire room when they’re only good for 8-10 feet of illumination. Anything off to the sides or further back needs to be brightened up a bit. I’ll may also darken the ‘blacks’ slider slightly to increase contrast and give the image a bit more pop! As I always use LR first in processing, I can’t speak for how easy or difficult it is in PSE to accomplish the same things described above. In the quick mode, only 1 exposure slider is offered and 3 ‘lighting’ sliders: shadows, midtones, and highlights. Unless dealing with badly over/under exposures, they should suffice. Alternatively, the ‘enhance’ tab has more settings and flexibility.   Date: 04/09/20 13:16 Re: Photoshop Elements Author: BRAtkinson My number 3 priority is to get the image properly levelled. I cringe every time I sit in one of my dentists’ ‘hot seats’ that has a 14x16 print of one of his scenic images he made of a beach with a slightly off kilter ocean. I haven’t the heart to tell him, though. Cropping works great for getting horizontal things horizontal. In this latest group of family album slides, apparently someone was doing home developing and didn’t have any square mounts for roughly 100 slides taken with a Kodak Instamatic camera. So they were mounted in standard 35mm film mounts! Cropping them to square was a breeze.
Cropping in LR is easier to use than PSE in some respects, and harder to use in others. In LR, it’s the image that tilts to fit the horizontal/vertical cropping window. Horizontal and vertical lines are overlaid during cropping to make it easy to line up things horizontally and/or vertically. In PSE, it’s just the opposite…the cropping box tilts and the image stays fixed. It’s also possible to include blank areas outside of the image while cropping in PSE as well. PSE is the winner, however, when it comes to using a common set of cropping dimensions across multiple images. In addition to keeping the original photo dimensions (default), it can be set to any combination of common settings (4x6, etc) or customized as desired and used across any number of images without having to reset the dimensions on each one as required in LR. That’s particularly useful to me as I tend to ‘shoot wide’ as I wear my glasses while looking through the viewfinder and then crop it in post processing to not only make things horizontal, but to selectively eliminate peripheral things in the image I don’t want. So, I use cropping in LR to get things level, but use PSE to pre-crop images I’ll be printing at common sizes such as 4x6, 5x7, etc. Doing so allows ME to choose how to crop the image rather than some software product and/or printer firmware I happen to be using for printing making the decisions. However, until the introduction of the ‘transform’ feature in LR about 2015 (I’m guessing), getting vertical things vertical (like poles, doorways, building walls) was a compromise to get ‘looks right’. Nowadays, I use the ‘transform’ option on ‘auto’ to straighten things out, which does wonders for keystoning of doorways and walls. In doing so, it stretches things a bit and sometimes will tilt the entire image causing important subject info (like people) being cut off or lost. When that happens, I have to <cntl> Z to undo it and see what I can do with simple cropping to straighten things out. I’ve not found or used a comparable feature in PSE. However, in Expert mode, the Image tab has a transform feature that may be used to get similar results. I’ve never used it and only played with it a few seconds before writing this paragraph.   Date: 04/09/20 13:18 Re: Photoshop Elements Author: BRAtkinson Then we get to #4 on my scanned images list of edits…dust and scratches. I’ll throw in mold as well as I’ve had to deal with that in 2 of the 4 sets of ‘family albums’ I’ve converted.
So far, I’ve scanned maybe 4000 images total from 4 different families plus another 40 or so from the local hisThetorical society to recover & restore images from the 1800s. After looking at boxes of loose slides and prints, and even partially filled Kodak Carousel trays of slides, I’m convinced that people simply stored them wherever they could find space. One family from Rhode Island lived within a block of the ocean. 50+ years of basement storage created a LOT of mold on those slides. In many of those, I’d spend 15-20 minutes doing the best I could at recovering the people and key subjects like a special car. The rest of the image I’d do a quick fix to what I could, then leave any blue, green, or black mold outside of the subjects. Some faces were partially or all unrecoverable. Other families, like the one I just finished, must have stored their slides in the desert and subjected them to dust storms. In reality, they were in Maine and Massachusetts. So where’d all the dust come from? It looks like the only way to view the slides was a handheld viewer (in the bag of slides I was provided) which accounted for every slide being individually handled many times through the years. Some of the more important images, such as their wedding in 1970 or so, I spent considerable time – maybe 45 minutes or so, each - cleaning up the dust, mostly using the ‘heal’ function in LR. The LR heal function allows a seemingly automatic way to remove a spot here or there, a scratch somewhere else (dragging the healing circle), and even remove a lit ‘exit’ light showing through a black side curtain on a stage. It mostly works great! Simply moving the mouse over an area, turning the wheel on the mouse to adjust the healing circle size (‘brush’ in their parlance), one click, and it’s done! LR chooses something nearby of similar color, intensity and <whatever> of the same size, and blends together the colors with the area being healed. This prevents a lighter color from being used to heal a darker shade leaving a clearly identifiable circle of what you did. Until your next action, both the healed (target) circle and source circle show up and an arrow connecting the two pointing to the target. Depending on what is being healed, its accuracy rate in source selection can be near 100% to as low as 50% when healing intricate designs or small areas of someones’ face, for example. Fortunately, either now or sometime later (after any number of clicks and other edits, simply by clicking the target while the heal function is active to reactivate it) either or both the source and target circles can be moved by dragging them and increased or decreased in diameter by using the scroll wheel on your mouse. Just 2 or 3 weeks ago, I ‘discovered’ the heal function also has a ‘clone’ option to it, too. Clone works just like heal does, except there is no blending of colors so unless both the source and target are the same color, it will be noticeable. In PSE, until I ‘discovered’ its heal function 2-3 weeks ago. I have no idea when that was added. Previously, I relied 100% on ‘clone/stamp’ to fix a myriad of image problems from scratches, make things like light switches or utility poles appearing to sprout from someones’ head disappear, and the like. Being able to specifically choose the source area is worth its weight in gold. Also, either LSE 14 or 15 now makes the target circle show exactly what will be stamped before clicking the mouse! This allows almost 100% accuracy in lining up straight lines to extend them such as pipes, doors and wall corners, etc. In PSE 13 and before, it was trial and error several times using <cntl> Z to undo the misalignment and starting over. This improvement alone made upgrading to PSE 15 worthwhile for me! As the heal and clone functions in LR automatically choose the source (pretty well when straight lines are involved), it usually does pretty good…but…the results almost always need some minor adjustment to get the target properly lined up. I also used clone/stamp at lower opacity settings to brighten or darken areas of an image, particularly dark circles under ones’ eyes and to remove skin blemishes, especially on teenagers. Using the lower opacity allows smooth blending of skin tones rather than leaving an obvious ‘repaired’ area. No such capability exists in LR. Finding the heal function in PSE REALLY opened my eyes of how heal SHOULD work! It’s lightning fast, and roughly 95% or more accurate in its choice of source and does far better at blending complex designs such as a small checkerboard pattern on a dress or wall paper from the ‘20s and ‘30s with seemingly endless scroll designs and/or flowery designs on them. It also handles changing the rounded corners of a slide image to be a right angle flawlessly. In one situation 2 nights ago, I completely removed about 15% of the bottom corner of an image that had a distracting whitish throw rug on it and heal extended the hardwood floor PERFECTLY! Amazingly, PSE heal also removed the purplish blue tint (from mold that only colored the area?) from small areas of a number of images (maybe 1/8 to 3/8 inch diameter on the slide itself), even on individuals faces! GO PSE HEAL!!!! Maybe that’s why Adobe recommends using PSE heal function rather than LR heal function on their website…   Date: 04/09/20 13:19 Re: Photoshop Elements Author: BRAtkinson As a result of discovering the improved accuracy and speed of the PSE heal function, I experimented for the last two days of processing images (I work in groups of roughly 30-100 related subjects at a time through LR then PSE) and did NOT remove the larger dust and scratches in LR. Instead, I took on the task in PSE instead. I’m now 90% convinced that removing the big stuff in PSE is the way to go. Partly because it doesn’t get progressively slower with each click in an image like LR does and its far better choices of source areas to heal from. The only negative with the PSE heal function, and also the clone/stamp function, is changing the brush size. In LR, it’s simply scrolling the wheel while in heal mode. In PSE, it’s move down to the bottom of the screen to the current tool options panel and moving a slider. Opacity is also there for clone/stamp. As an aside, that same tool option panel in full-version Photoshop 2020 is microscopically small on the upper tool bar near the left side. Larger tool icons and options is 99% of why I use PSE vs PS.
Since I’m talking about dust and scratches, here’s the place to talk about how I handle them. One of the features in PSE is in the ‘filter’ drop down tab, ‘noise’ and then ‘dust and scratches’. D&S works great! There’s also a companion ‘despeckle’ that works in some situations, such as really cranking up the exposure in exceedingly underexposed slides. D&S has an option of how big a diameter should be considered as dust. I’ve tried values from 1 to 3 just to see the results (almost automatic use of <cntl> Z to undo is a requirement for all my editing). Using a value of 1 does the least ‘damage’ to the image, eg, very minimal blurring/loss of clarity/sharpness. 2 makes a noticeable loss of clarity, and 3 is just too much loss to be acceptable. I have used D&S set to 1 with 2 or 3 consecutive times (<cntl> F to repeat) as an experiment and found less clarity loss than using 2. Again, I’m a very big user of <cntl> Z as I use a LOT of trial and error in all my editing. Naturally, using a setting of 1 for D&S doesn’t remove any of the larger dust, or even thread-like lines, or scratches, either. So, it’s necessary to remove them ahead of using D&S. As I had been using the clone function in LR seemingly forever to pre-remove the bigger dust and scratches, I simply kept on doing so…until I discovered the heal function in PSE 2-3 weeks ago. I should note that in some heavily dusted images, once LR performance got unbearably slow (1+ seconds between clicks), I’d leave that image and go on to the next one. When done with the entire group, I’d export them, then re-import them with a new LR catalog so I could continue editing the ones I couldn’t finish the first time. It also allowed me a second look at the ones I had finished and I sometimes made an extra touch up here and there, such as a minor color adjustment, etc. Sometimes, I’d simply leave the undone dust and scratches and manually clean them up in PSE with clone/stamp. I’d also use clone/stamp to fix up problems that can’t be handled in LR such as very small area dust/scratch cleanup or when the dust is in a pattern that LR heal can’t be ‘convinced’ to do it right after multiple attempts. But now with PSE heal…THAT will be my first process in PSE THEN do dust and scratches set to 1. The trick in pre-cleaning up larger dust and scratches is figuring out what can D&S do and not do. Sometimes, I’ve left a couple of specs that were turned into a blur by D&S, so I’d have to clean those off afterward. I also have a PSE plugin noise cleanup program that I can control how strong the noise (dust) is that it will clean off in addition to limited image sharpening as well. So after D&S, I’d TRY using the noise plugin and check the results. I’d flip back and forth using <cntl> Z to undo and <cntl> R to re-do to decide whether or not I liked the results. Maybe 20-25% of the time, I kept the results from the noise plugin. Xxxx So far, I’ve detailed about 99% of how I edit all my pictures from slides and negatives to digital. As is obvious, I’ve only scratched the surface on what LR and PSE can do. And 99% of the time, that’s all I need. Now for the ‘sometimes used’ features I’ve used… It’s only been since I started processing this family album in late February that I ‘discovered’ -aka, forced to learn- a couple of new tricks for this old dog. First of these was learning how to excise a small portion of a photo, such as a face, take it to a separate layer, edit it, then put it back into the original image. This capability is unique to PS and PSE. Fortunately, I was forced to learn about layers in full-version Photoshop about a year ago when I started receiving artwork for our Sunday church bulletin that I had to modify to fit on CD s that I later recorded with that days’ message. After doing it twice, I decided that trying to correct skin color without seeing the rest of the image at the same time (yes, it IS possible, but I didn’t do so), I couldn’t get accurate results. In discovering less than 2 weeks ago how the ‘magic wand’ worked to select any definable area of any shape, including irregular borders, based on color boundaries to create a new layer, I could also edit the selected area ‘on the spot’ within the entire image using all the controls available in PSE. I’m in Heaven now! I’ve done a couple of such edits since learning to do that. I should note, too, LR has a similar capability in its ‘radial filter’ tool, but is limited to an oval or circular shape only and only some of the exposure & color edits are available. Radial filter works great at simply brightening up someones’ face that is otherwise in a shadow as by default, it automatically ups the exposure within the oval by a tad but can be adjusted up or down as desired. In discovering the ‘magic wand’, I also decided to expand upon removing only a face for separate editing to removing everything of interest…ie, 3 people sitting on a large rock against a very heavily speckled sky in the upper 40% of the image. I would have had to spend several hours cleaning up just the sky because of all the problems. So, I excised all subject area, created a new layer with the sky color pulled from the image (eyedropper tool then paint bucket), then plopped the people into the 100% clean background then flattened the layers. I had to do some minor touchup with clone/stamp to remove excess foliage behind them I didn’t want in the image. I did that in another image where all three young daughters (now in their 50s) were posed in front of a sheet as a backdrop that was covered with dust. I think my friend and her sisters will like the results. In addition to the ‘transform’ (for vertical/horizontal correction) in LR, added in LR 5 or 6, I think, they added another new feature that I discovered with LR Classic 2020 that I have now started use when needed…post-crop vignetting. Essentially, it brightens up the corners of an image that either didn’t get enough light either from the flash or caused by a circular lens hood too small for a particular lens. In this bunch of slides, the tiny on camera flash such as a magicube or <whatever those 6 or 8 tiny bulbs in one vertical package was called> didn’t provide enough light outside the primary cone of light in the image. It seems to work by lightening the corners using a slider. It’s easy to make it too bright and washed out a bit, too. I’m still experimenting with the extra settings as well as sliders to have any idea of what I’m doing.  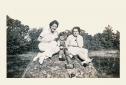 |